Lynknex MX1 Install Guide

What's in the Box

  • Lynknex MX1 Device
  • Handheld Microphone with mounting clip
  • Vehicle Mounting Bracket
  • Power Cable / Wiring Harness
  • LTE Main Antenna (long, narrow antenna)
  • LTE Stubby Antenna (diversity antenna)
  • Wi-Fi Stubby Antenna
  • GPS/GNSS Antenna
  • Mounting Screws and Hardware

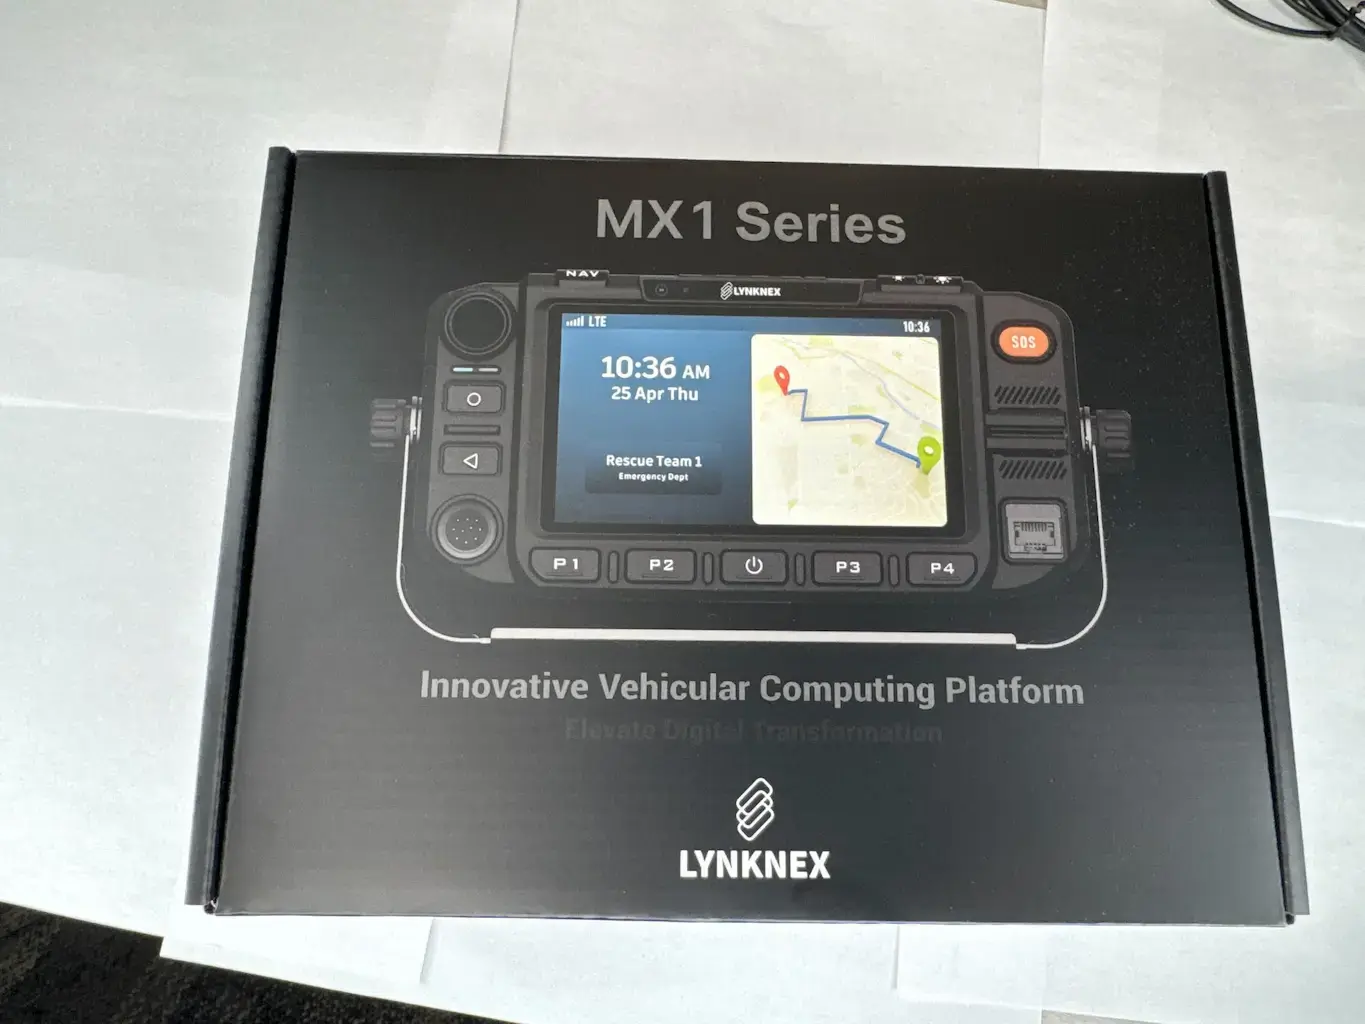
If anything is missing, Contact Us.

Lynknex MX1 In-Box

Power Wiring

Connect the power harness as follows:

  • Red (Constant Power): Connect to a full-time 12V hot source (battery or fused constant power circuit).
  • Orange (Ignition Sense): Connect to a switched ignition circuit so the device powers on/off with the vehicle.
  • Green: Not used (cap and isolate).
  • Black (Ground): Connect to a solid chassis ground or battery negative terminal.

Important: Always use an inline fuse on the constant power lead.

Lynknex MX1 Power Harness

Ignition-Off Behavior (Default Setting)

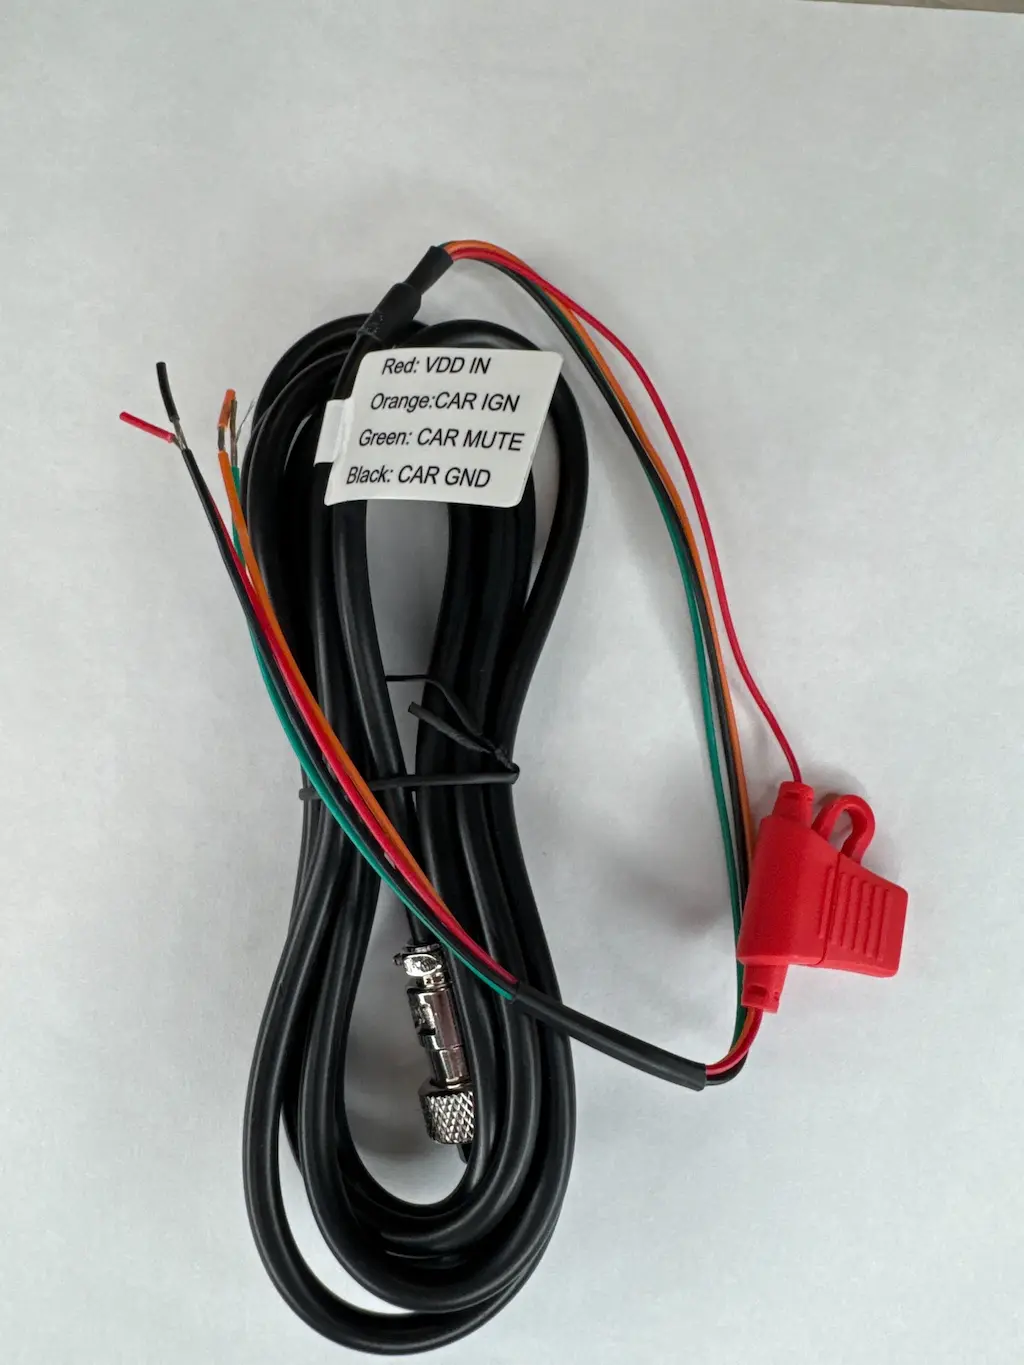
Be default when the key is turned off:

  • The screen will stay on for approximately 5 minutes.
  • The device will then enter sleep mode for up to 24 hours.

This behavior:

  • Preserves the last known GPS location
  • Speeds up boot time when the vehicle is restarted
  • Reduces power draw while keeping the radio ready

Antenna Connections (Rear of Device)

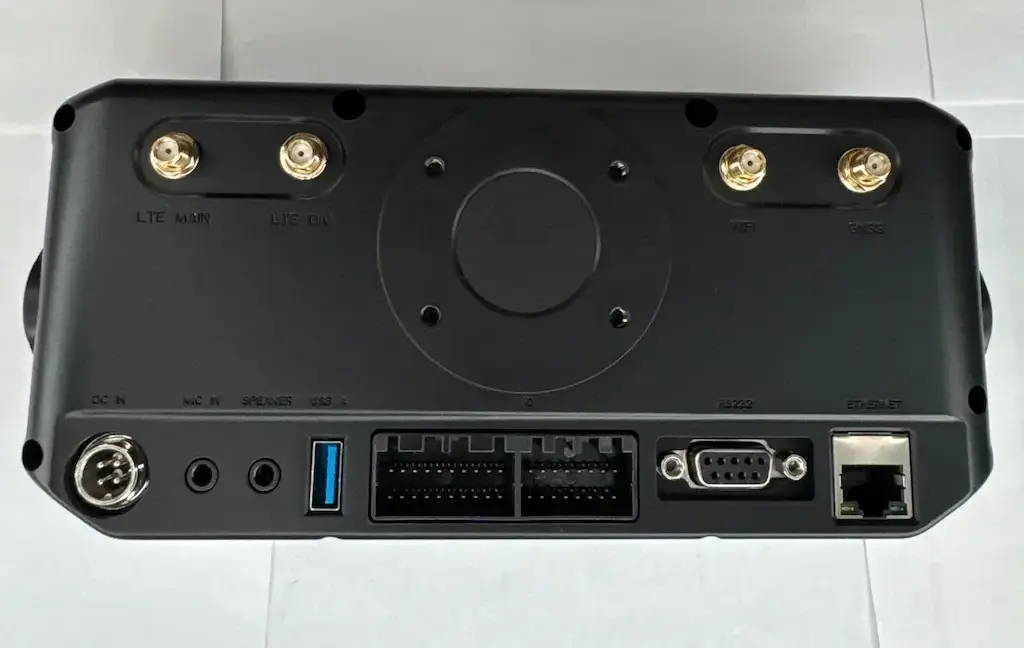
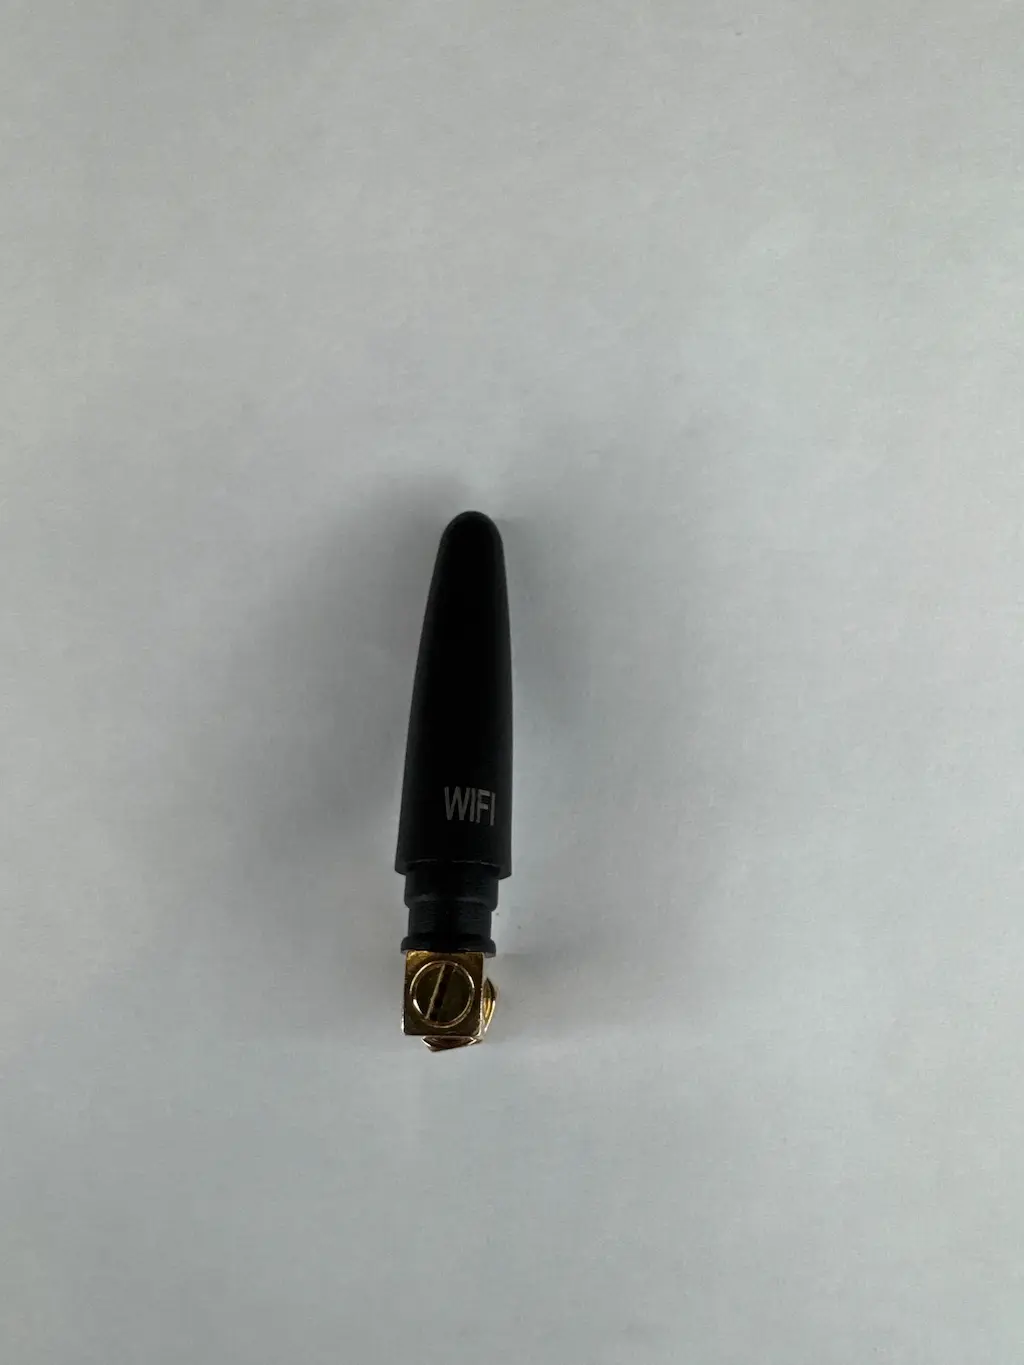
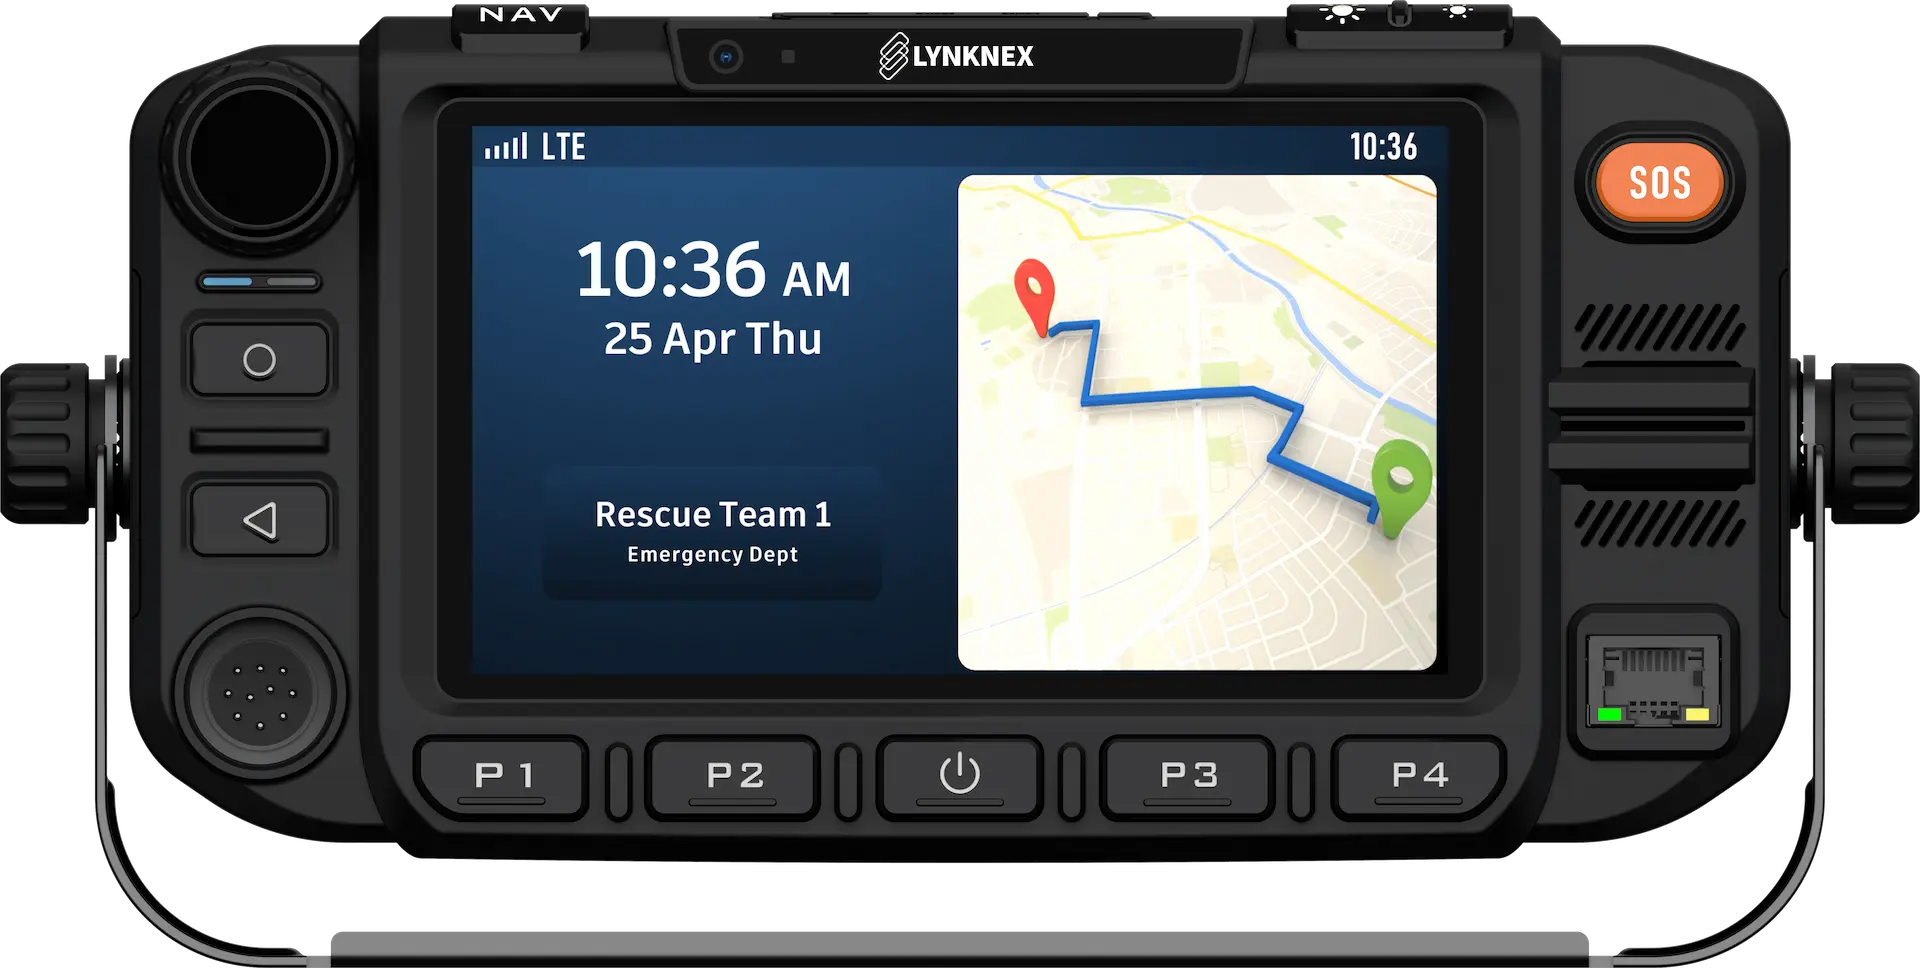
Connect antennas to the rear ports as labeled on the MX1:

Lynknex MX1 Back
  • LTE Main: Connect the long, narrow LTE antenna (primary cellular antenna).
Lynknex MX1 LTE Antenna
  • LTE DIV (Diversity): Connect the stubby LTE antenna (secondary LTE antenna).
Lynknex MX1 LTE Diversity Antenna
  • Wi-Fi: Connect the stubby Wi-Fi antenna.
Lynknex MX1 WiFi Antenna
  • GNSS (GPS): Connect the GPS/GNSS antenna.
Lynknex MX1 GPS Antenna

GPS Antenna Placement

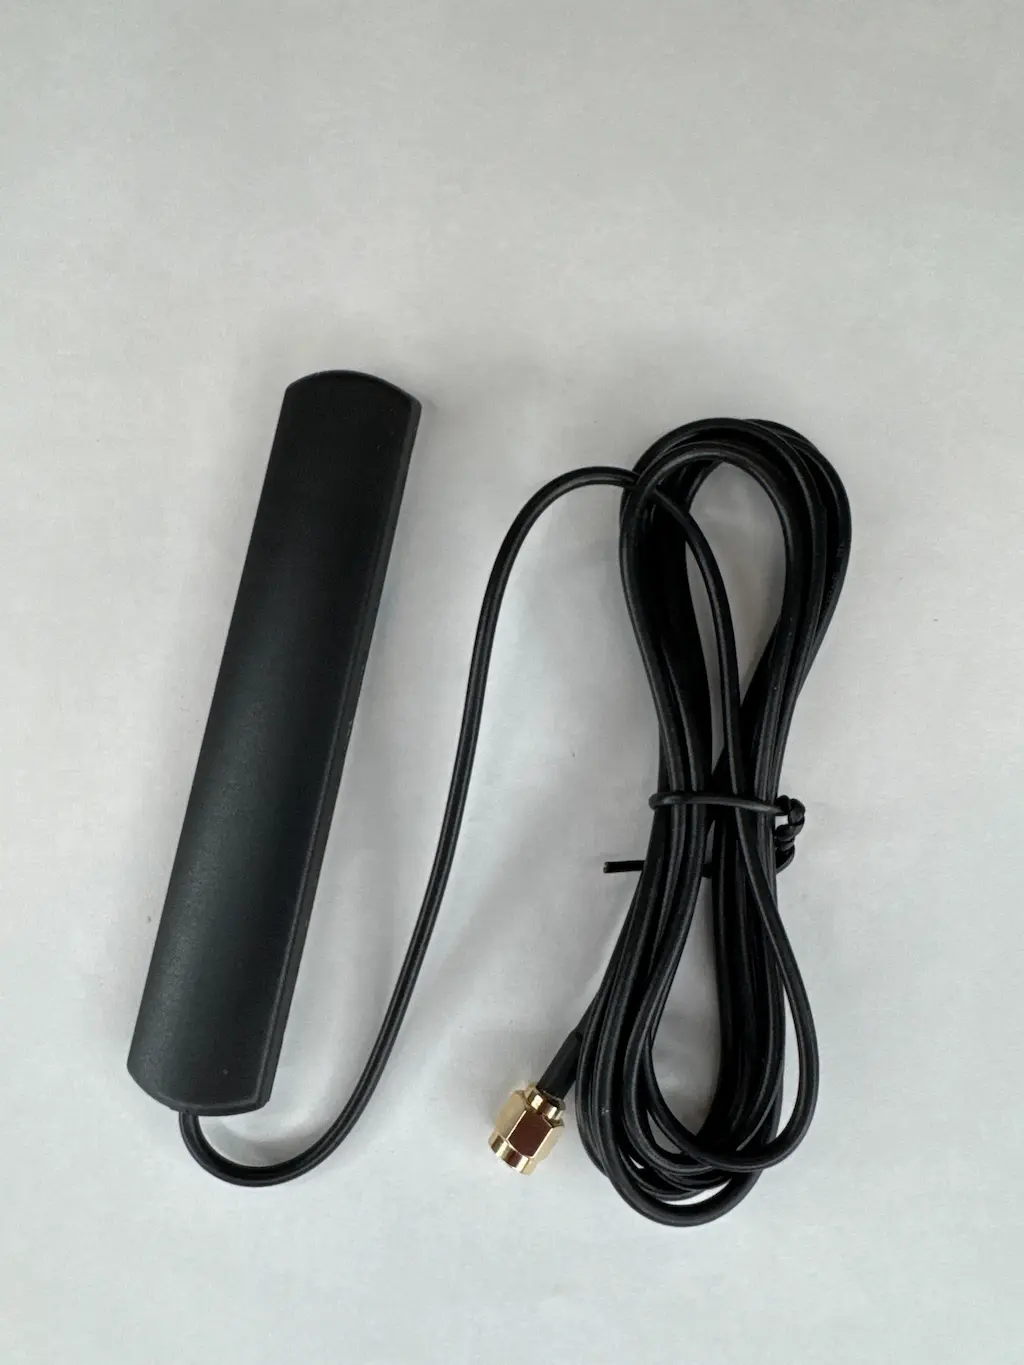
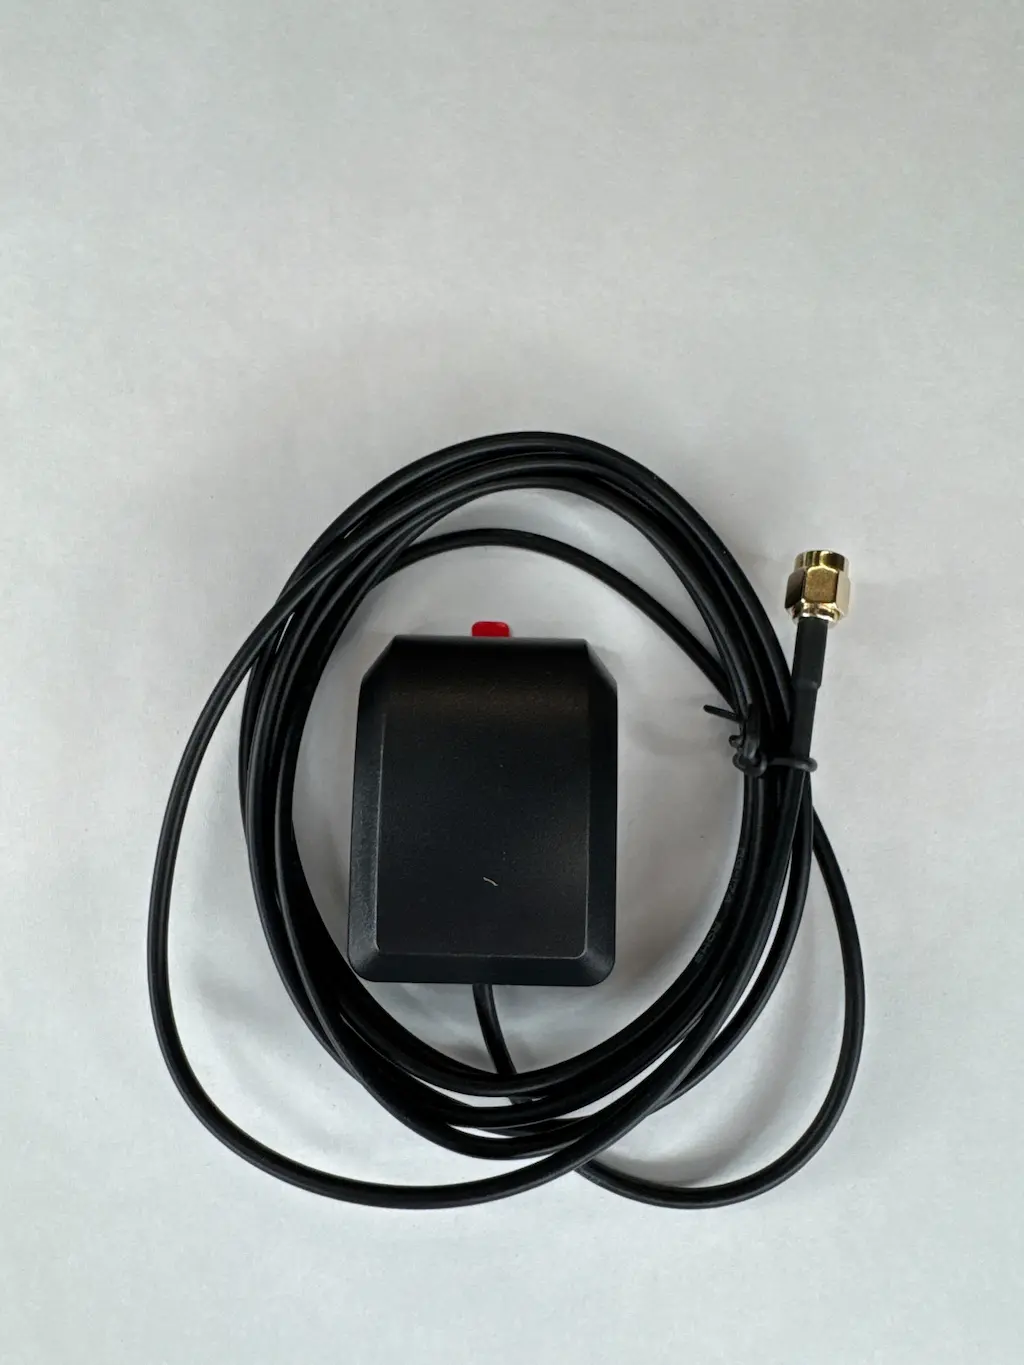
For best GPS performance, mount the GNSS antenna:

  • On the dashboard
  • Near the windshield
  • With a clear view of the sky

Avoid mounting:

  • Under metal
  • Under heavy trim panels
  • Inside glove boxes or trunks

Handheld Microphone

  • Plug the handheld microphone into the connector on the bottom-left of the device.
  • Use the included clip to mount the mic within easy reach of the driver.
Lynknex MX1 Front

Mounting the MX1

  • Attach the mounting bracket to a secure surface (dash, console, or under-dash).
  • Secure the MX1 into the bracket using the included screws.
  • Ensure airflow around the unit and avoid direct heater vents.
Lynknex MX1 Mounting Bracket

Wiring Best Practices

  • Route cables away from sharp edges and moving parts
  • Use zip ties to secure all wiring
  • Do not coil excess antenna cable tightly
  • Avoid placing antennas near large metal surfaces when possible

Final Install Checklist

  • All power wires securely connected and fused
  • LTE antennas connected and upright
  • GPS antenna mounted with sky view
  • Microphone connected and mounted
  • Device secured to prevent vibration damage

Verify:

  • Confirm LTE signal and network connection
  • Confirm GPS lock and location reporting
  • Test PTT / voice audio with the microphone
  • Ignition behavior verified (turns on/off with key)