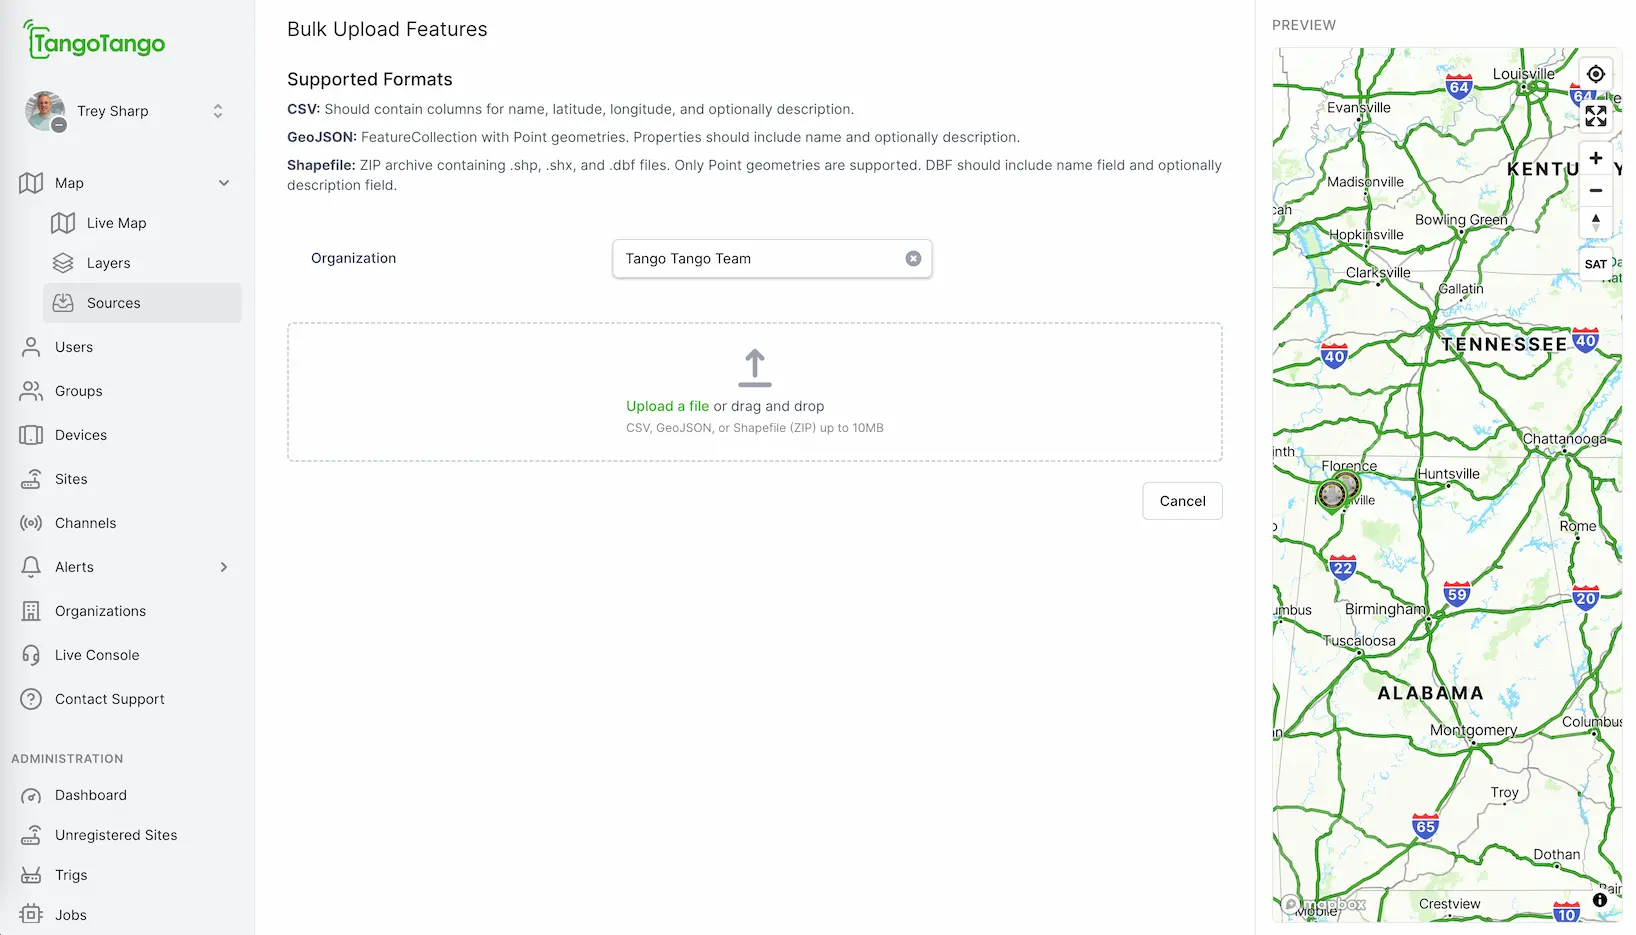
Organization Admins can upload many Layer Features at once from a file. A Layer Feature is an individual location in a layer, such as a fire hydrant, rally point, or station. To add just a few, see the Add Layer Feature guide.
Before you start
You'll need:
An existing Layer to receive the Features. If you haven't made one yet, see the Create Layer guide.
A data file with your Feature locations, and descriptions if you want them, in one of the supported formats below.
Supported file formats
FormatRequirements
CSV - Columns must include name, latitude, and longitude. Optional column - description .
GeoJSON - A FeatureCollection of Point geometries. Properties must include name; description is optional.
A ZIP archive containing .shp, .shx, and .dbf files. Point geometries only. The DBF must include a name field; description is optional.
Coordinates must be in decimal degrees (for example, 34.7304 and -86.5861).
Don't have a file yet? Build a CSV in Excel or Google Sheets with columns for Name, Latitude, Longitude, and Description, then export it as CSV. For more than a handful of locations, this is much faster than adding Features one at a time.
In the Organization drop-down, select the organization that will receive the Features.
Click upload a file and choose your file, or drag and drop it onto the drag and drop box.
Reviewing your Features
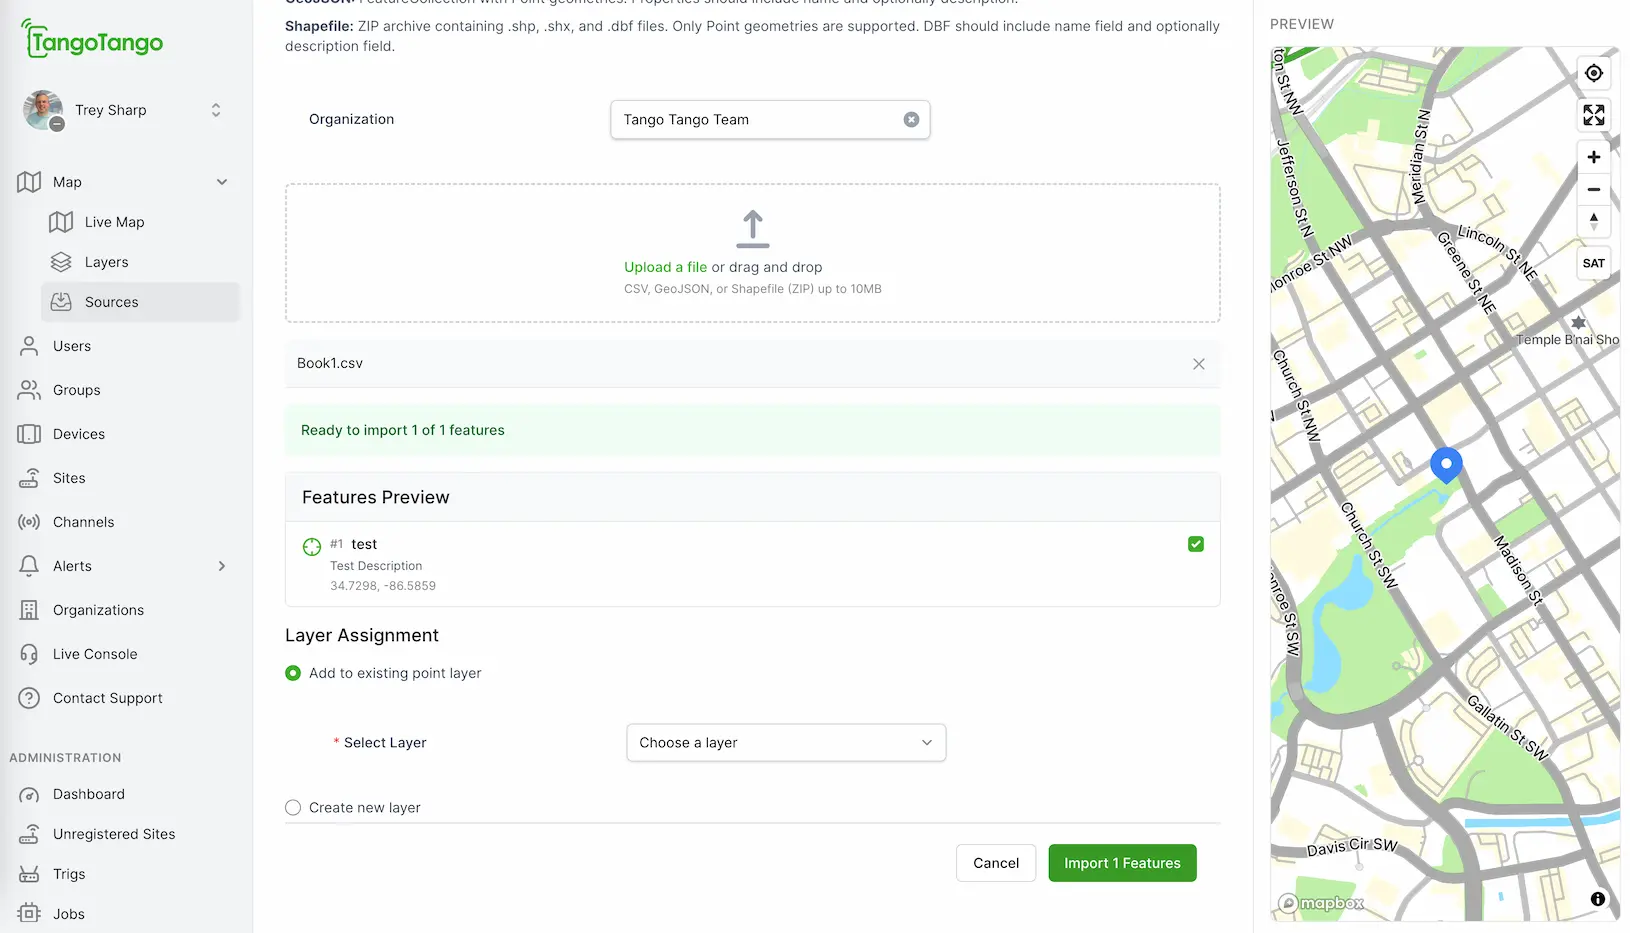
After the upload, you'll see a list of the Features about to be imported. Click the target icon to the left of any Feature to zoom the Map Preview (on the right) to that location.
Check that the pins look right. If something is off, fix your file and upload it again. Or, Contact Us, if something appears off in how we are parsing your file.
Importing
Next to Select Layer, choose the Layer that should receive the Features.
Click Import X Features (X is the number of Features in your file).
Your Features are now live for all users who access to the Layer.
Still stuck?
Reach our support team — Mon–Fri, 8am–5pm Central.