Short videos and step-by-step guides for Tango Tango Admins. Adding Users, setting up tones — all covered.
Quickly jump to what you're looking for.
Short videos and step-by-step guides for Tango Tango Admins. Each takes about two minutes.
Here is a step-by-step guide to add a user to your organization.
Important: by default, a new user is not joined to any channels at time of creation. They won't receive channel traffic until they are added to at least one channel.
Live Console Tone Generation
You can use Tango Tango's Live Console to send a tone-out event to your existing radio or pager system.
Setting Up Interop
Here is a walkthrough to setup shared channels between your organization and another org that is using Tango Tango.
Adding First-Response Tones in the Admin Portal
Add Members to Tones
Mobile User app
Tango Tango forwards CAD incident alerts from your existing CAD system to mobile phones. Setup is easy and doesn't require any changes to your CAD system beyond pointing new-incident emails at an address we provide.
You'll need an active Tango Tango account or free trial. If you're not set up yet, start a free trial first — then come back here.
You'll also need admin access to your Tango Tango Admin Portal to manage who receives alerts.
1. Request a CAD alerting email address. Email us at support@tangotango.net and let us know you want to set up CAD Alerts. We'll reply with an email address specific to your organization.
2. Point your CAD system at that address. In your CAD system, configure new-incident emails to send to the address we provided. Our parser reads those emails and converts them into alerts for your users.
3. Add recipients to the alert group. Once your CAD system is sending us emails, the last step is choosing who gets the alerts:
That's it. New incidents from your CAD system will start hitting your team's phones within seconds.
If you need separate feeds — say you're a volunteer fire association covering ten departments and each one needs its own alert stream — just request additional alerting email addresses in step 1. Each address maps to its own group in the Admin Portal, so you can route different incident types or different departments to different teams. There's no practical limit on how many feeds you can run.
Email us at support@tangotango.net and we'll help you work through it. A few of the most common issues:
Alerts arriving too slowly. Our typical processing time from the time we receive your email is 7 seconds. If you're seeing a long delay than this, typically, the delay is in how long your CAD system takes to send the email. Things to check as you start to troubleshoot:
Alerts coming through but not parsing correctly. This usually means your CAD system's incident format changed recently. Email us and we'll update the parser to match the new format.
Want more detail on CAD Alerts and how Sources and Feeds work? Check out this guide.
Anything else. Email support@tangotango.net. We'll get on it.
One of Tango Tango’s valuable features is the ability to detect First Response Tones and trigger notifications for users when they are detected. Many of our customers also use Computer-Aided Dispatch (CAD) systems to manage incident response in their agency, and Tango Tango is now able to integrate with those systems in order to trigger various notifications to our users when these incidents are created. The introduction of this feature comes with some changes to the way alerts are managed in the Tango Tango admin portal.
First Response Tones were configured and managed in the system via the “Tones” section on the left-hand navigation panel. This option has been replaced with an “Alerts” menu item which is broken down two sections: “Sources” and “Feeds”.

“Sources” is where you will find and configure First Response Tones and CAD integrations. Reach out to Tango Tango support to help get these items configured. Once the sources are configured, then it’s time to configure which users are interested in which alert notifications.
Previously, users were added directly to the Tones they were interested in. CAD sources worked similarly: users were added directly to the CAD source. However, it became apparent that managing memberships this way would not meet all use cases. Firstly, all of the alerts coming from a single CAD source are not relevant to a single set of users. Secondly, CAD events are often relevant to the same groups that were currently assigned to Tones.
To address all of the use cases, we have introduced the concept of Feeds. As the name suggests, a Feed is a stream of events that are related by the group of users that will be interested in being alerted about those events. When an event comes in from a CAD source, it is assigned a priority and routed to one or more Feeds via a configurable list of matching rules. First Response Tones are likewise routed to a Feed, although process here is simpler: all events from a given tone are always routed to the same Feed.
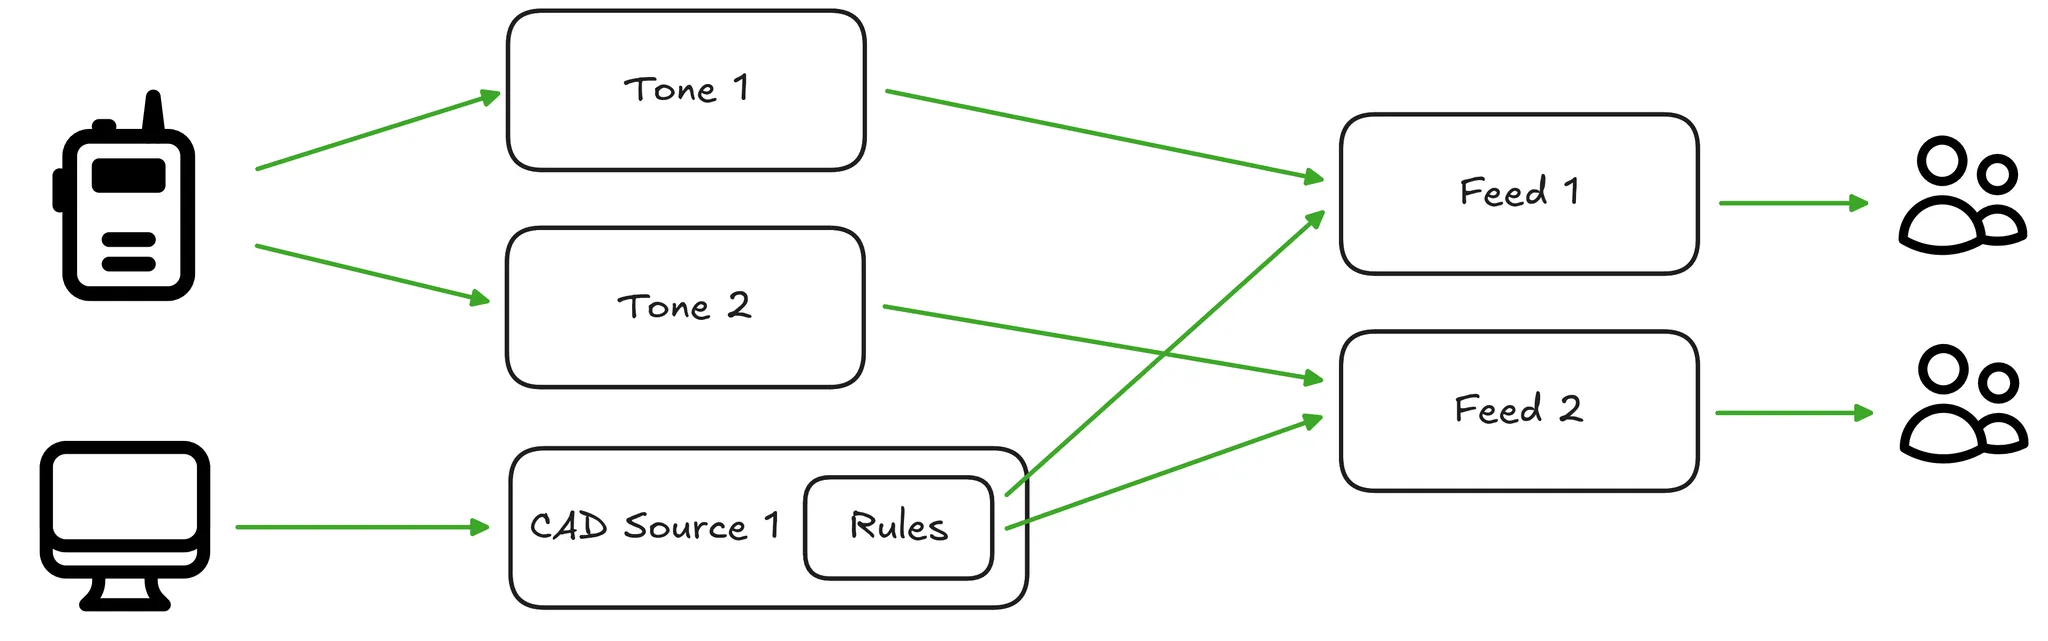
For more details on how to route alerts to appropriate feeds, see Configure Alert Routing with Rules.
If you had Tones or CAD Sources configured previously with users attached directly to them, you will now find that a Feed has been automatically created for each Tone/CAD Source and the user list from the original has been migrated to the Feed. Members of the Feed will continue to receive Incident Calls for Tone events or SMS/push notifications for CAD events as before.
Going forward, when creating a new First Response Tone or CAD source, you will be prompted to choose or create a corresponding Feed.
We believe this system provides the flexibility to support the needs of various types of agencies. As always, don’t hesitate to reach out to support if you have questions.
In the Tango Tango system, Alerts come in from an Alert Source and are then routed to Feeds. Users join or are added to Feeds to be notified about those alerts. You can read more about this system in our article on Managing Feeds.
To configure alert routing, click on Alerts > Sources in the top-level navigation, select the Source you want to configure, then go to the Rules tab. This screen is where you configure how incoming alerts from your Sources are directed to specific Feeds.
For First Response Tones: Configuration for Tones is straightforward. All alerts originating from a single Tone source are always routed to the same Feed. Once routed, the members of that Feed will always receive incident calls for those tone events.
For CAD Events: Computer-Aided Dispatch (CAD) sources require more granular routing. Because a single CAD source generates diverse alerts, you can use Rules to automatically route specific events to the appropriate Feeds based on the data within the alert.
Before building your rules, it is helpful to understand the basic logic the system uses to process an incoming CAD event:
You have three options for configuring rules on a CAD Source:
Use this option to build a rule from scratch based on known field names and values.
field name, choosing a matching operator (e.g., "contains" or "does not match exactly"), and entering a value.If you want to base a rule on an alert you have already received, the system can help generate it for you.
A Default Rule acts as a catch-all. It defines what happens to alerts that do not match any of your specific rules. If no default rule is provided and an alert does not match any other rules, the alert will be dropped.
Creating a Layer
Layers let you show hydrant locations, station locations, or any other points of interest on the Tango Tango map. Your layers appear in the smartphone app and in Live Map at manage.tangotango.io.
This guide covers creating a brand-new layer. If you already have a layer and just need to add individual locations (Layer Features), see the Add Layer Feature guide.
Have a lot of locations to add?
If you already have a file with all your hydrant locations (such as a Shapefile or CSV), follow our Bulk Import guide or email support@tangotango.net and we'll help you with the upload.

Creating a layer manually

Once saved, your layer is ready for you to add Features. See the Add Layer Feature guide for next steps.
Layer settings
Recommended zoom settings
Set Min Zoom to 10 and leave Max Zoom blank. This is a good default for dense layers like hydrants, which would otherwise cover the map when zoomed out. Adjust as needed.
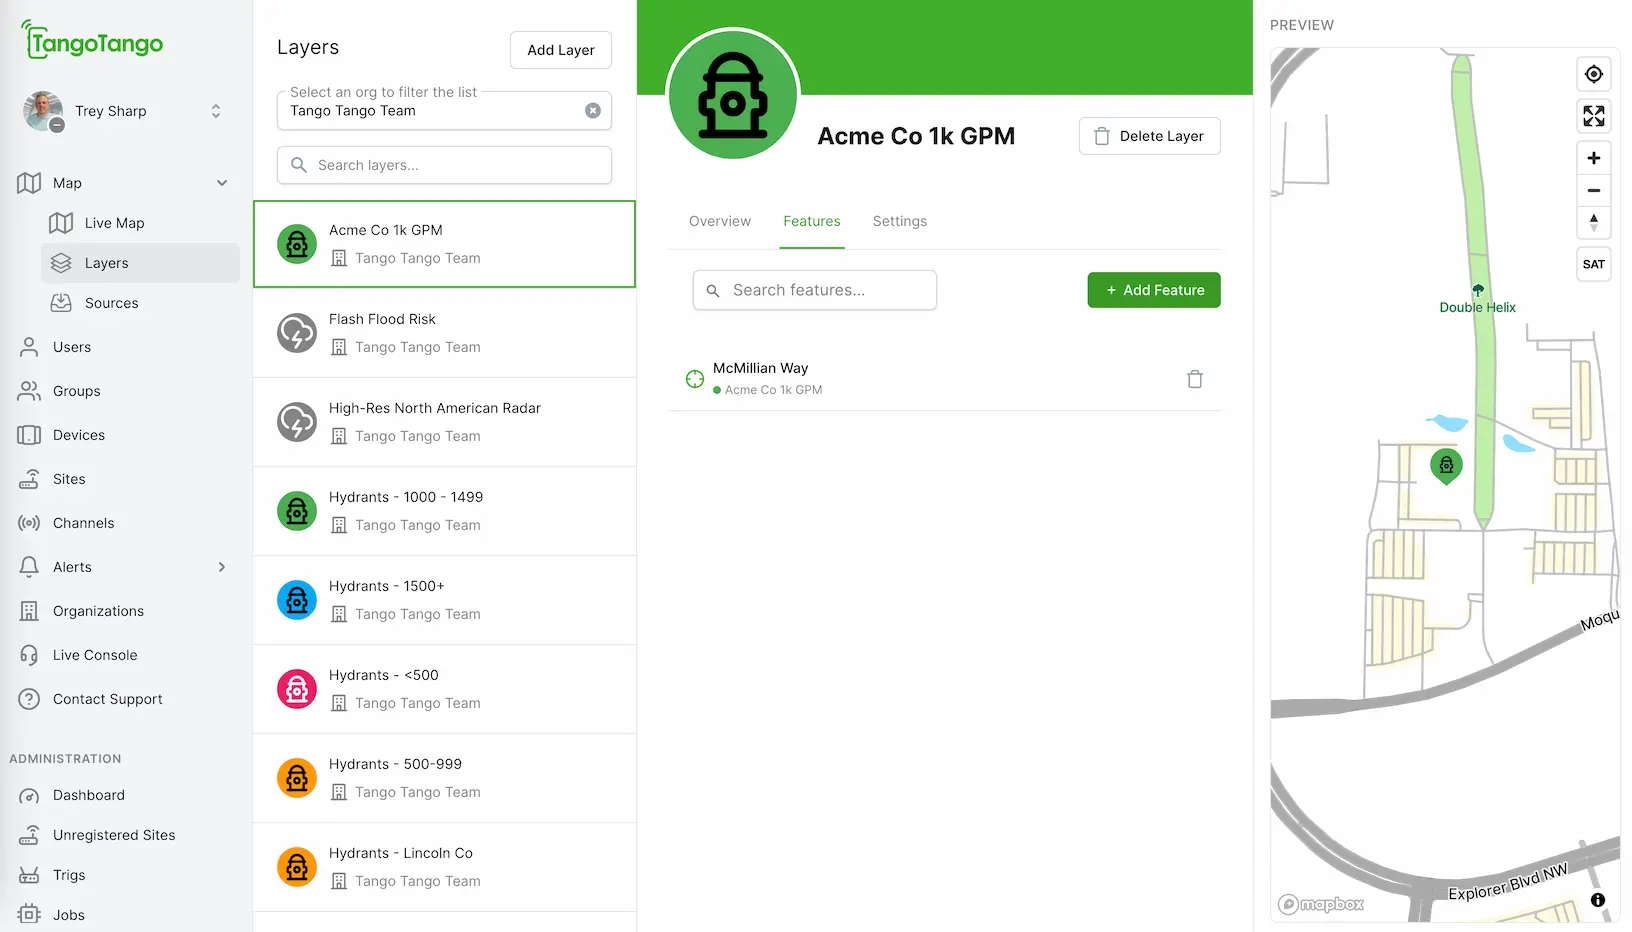
A Layer Feature is an individual location within a layer, such as a single fire hydrant. This guide covers how a Tango Tango Admin can add Features manually, one at a time.
If you already have a file with all your hydrant locations (such as a Shapefile or CSV), follow our Bulk Import guide to upload them yourself, or email support@tangotango.net and we'll help you with the upload.
.webp)
Your Feature is now live for everyone in your organization.
You have two options:
Made a mistake or want a Feature to go away?
Bulk Importing Layer Features
Organization Admins can upload many Layer Features at once from a file. A Layer Feature is an individual location in a layer, such as a fire hydrant, rally point, or station. To add just a few, see the Add Layer Feature guide.
Before you start
You'll need:
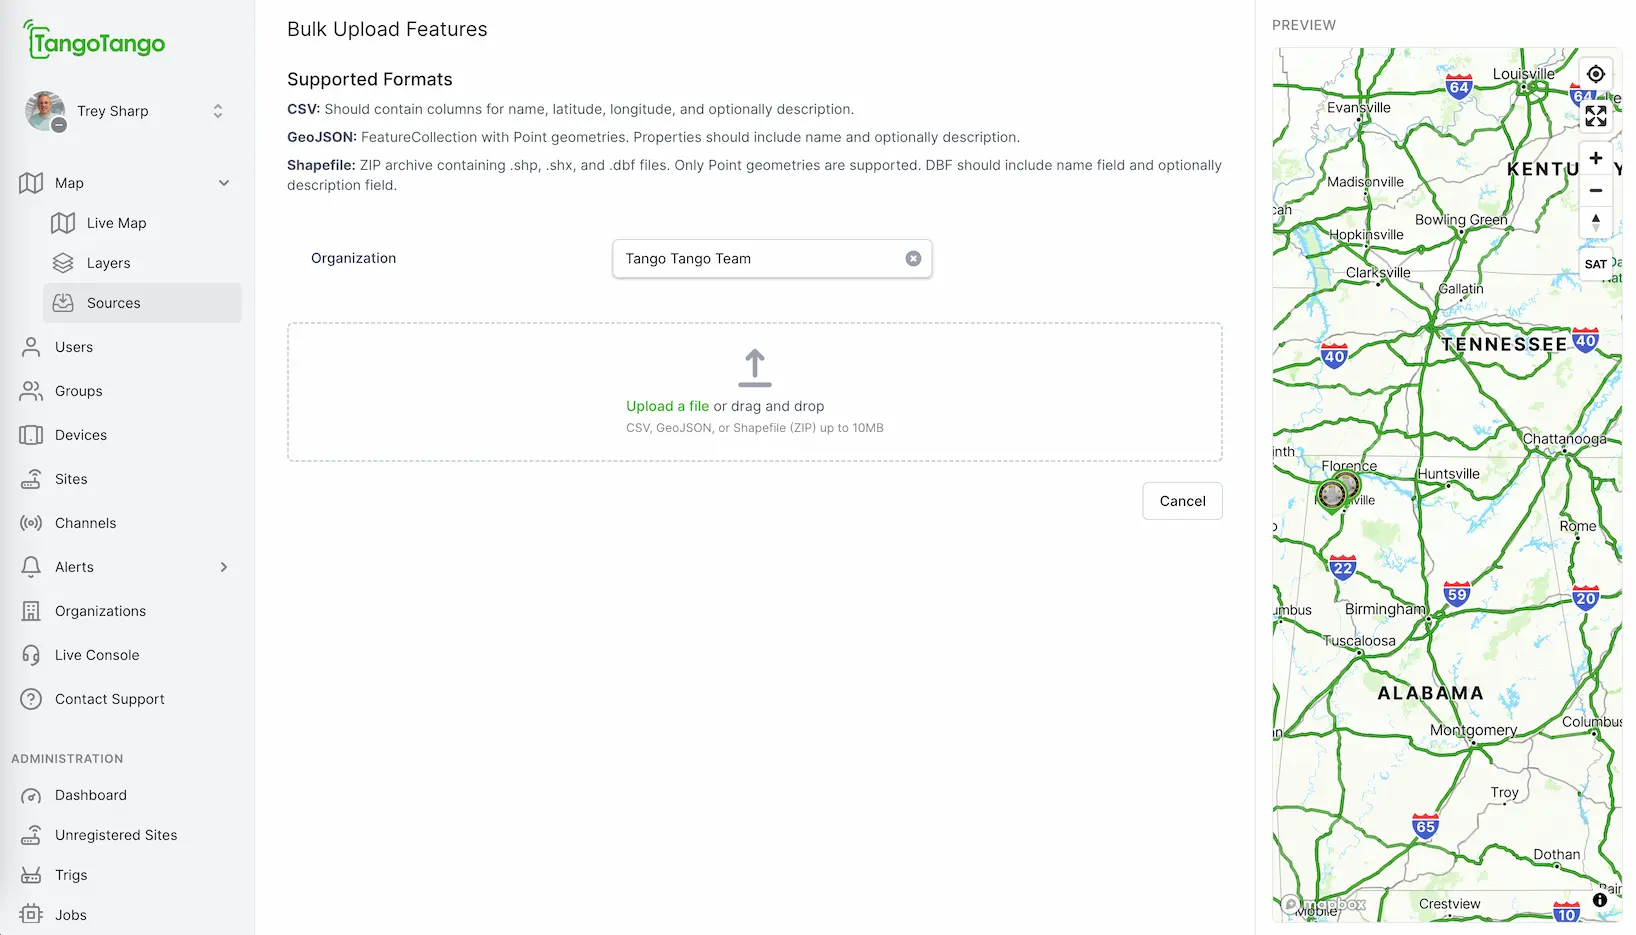
Supported file formats
FormatRequirements
name, latitude, and longitude. Optional column - description .name; description is optional..shp, .shx, and .dbf files. Point geometries only. The DBF must include a name field; description is optional.Coordinates must be in decimal degrees (for example, 34.7304 and -86.5861).
Don't have a file yet? Build a CSV in Excel or Google Sheets with columns for Name, Latitude, Longitude, and Description, then export it as CSV. For more than a handful of locations, this is much faster than adding Features one at a time.
Need a different format? Contact support@tangotango.net and we'll see if we can help.
Uploading your file
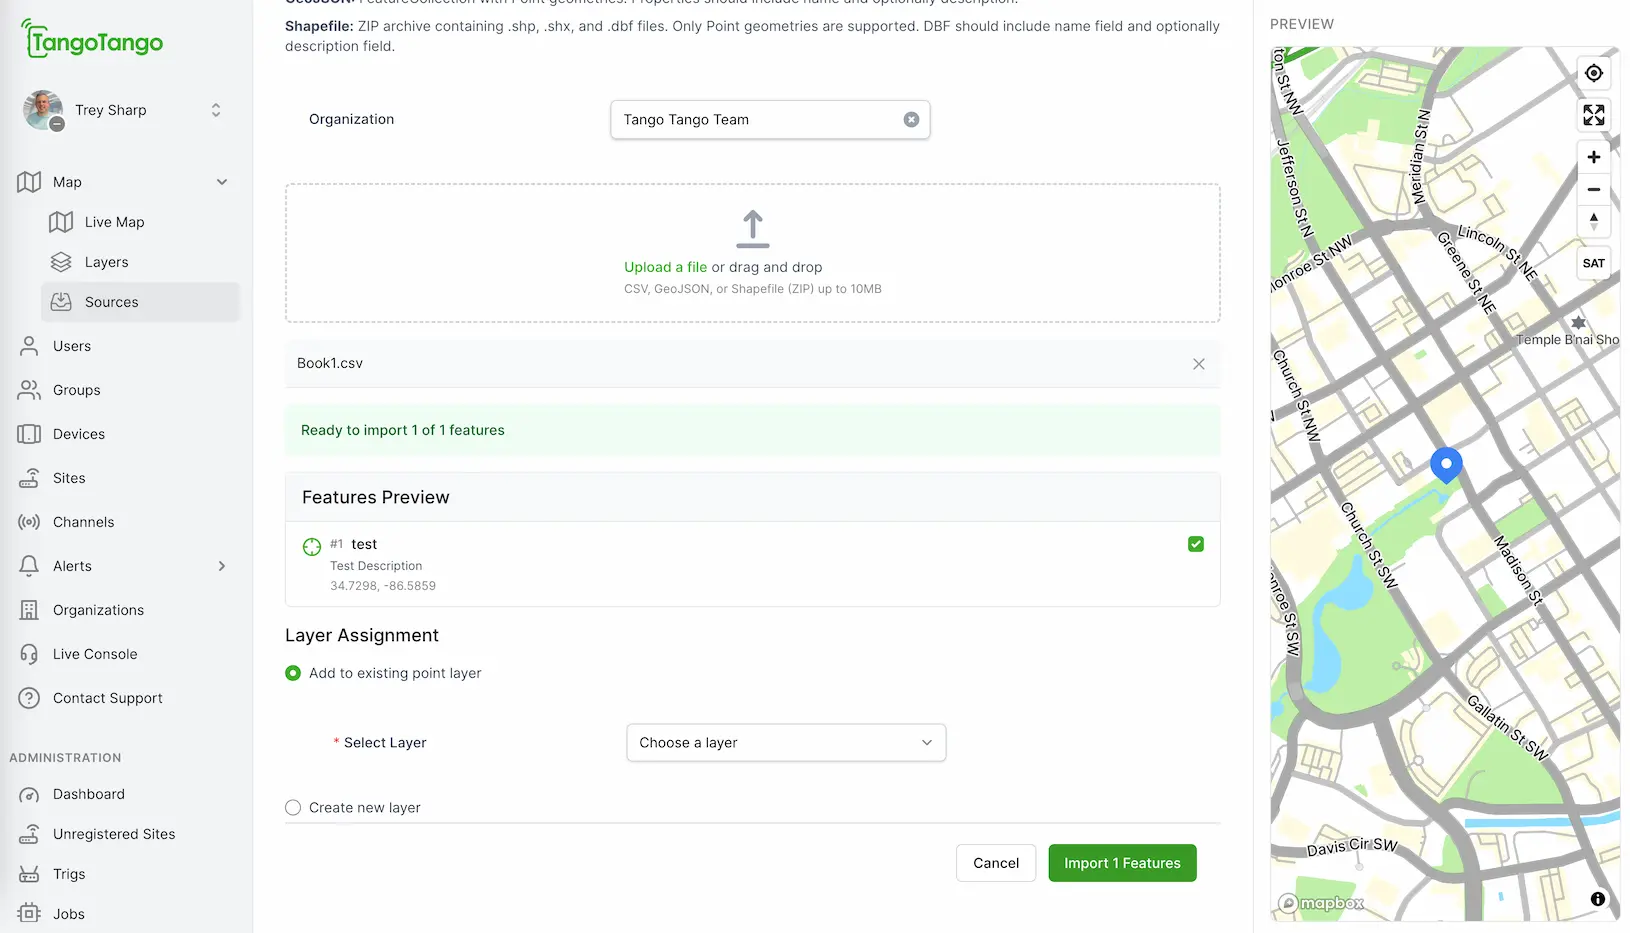
Reviewing your Features
Importing
Version 4.1 of the Tango Tango app adds support for Emergency Alerts. Emergency Alerting allows users to declare an emergency situation from the app. Users that have been provisioned as subscribers to feeds that are mapped to an organization’s emergency alert source will be notified via their app, or web-based admin portal. This notification will be prominent, with an alert tone and banners on the user interface. Emergency Alert notifications can be configured to break through a device’s silence or focus mode settings.
Emergency Alerts are configured in the Tango Tango admin portal, by admin-level users.
💡 Note: The Emergency Alert source may have been previously created automatically by the Tango Tango system. If your organization already has one, you may skip the steps above.
.png)
If your organization only needs a single set of users to receive emergency alerts, the next step is to simply add all the users to the emergency alert feed, which was automatically created when you created the source in the previous step.
If your organization needs alerts routed to different sets of users, depending on which user declared the emergency, use Groups. Create a separate group for each set of users and for each group, assign the feeds for that group.
To create a new group, navigate to Groups and click on Add Group.
.png)
Enter a name for the group, then click Save.
.png)
In the configuration page for the new group, click the Emergency Alerts tab and then click Add Feeds. Here, you can create new feeds or add existing ones.
.png)
Select the feeds to assign to the group, by clicking on the feed’s icon, or click Create New to create a new feed for the group. Then click Submit.
.png)
💡 IMPORTANT: Don’t forget to add the required users to each feed. The rules and group configurations specify only which feeds will receive alerts. The feed’s list of subscribed users determine which actual users will receive alerts.
To understand how Emergency Alert routing is configured for your organization, navigate to the Emergency Alert source and click Rules. This page shows how each group is configured to route to each feed.
.png)
In the rule settings shown above, you can see that:
💡 Additional rules can be added by performing the Group configuration described in the earlier section. Alert routing rules based on the triggering user cannot be added directly from the Rules page.
This section describes app settings for emergency alerts and the operation of alerts within the app. Note that emergency alerts are supported in app version 4.1 and later.
By default, the emergency alert button, used to declare an emergency, is hidden in the Tango Tango app. To enable it:
💡 If a user activates an emergency from their app, but alerts have not yet been configured in the portal, an emergency will be declared, but no other users will receive it.
The emergency button can be moved to any corner of the app display by dragging it.
The location of a user declaring an emergency will be sent to all other users receiving the alert, provided that the user has previously granted location sharing OS privileges to the Tango Tango app (i.e. during app installation). Emergency alert location reporting is not dependent on any app-based settings.
An activated emergency alert will play a notification sound in the Tango Tango admin portal. However, web browsers have various means of restricting web pages from playing sounds. When you first load the Tango Tango admin portal in a browser tab, the notice shown below in the bottom right corner may be displayed, instructing you how to allow your browser to play sounds.
This notification also displays instructions on how to permanently allow Tango Tango to play sounds. Users needing to reliably receive alert notification sounds should follow these instructions for their browser type.
.png)
From the Tango Tango app, a user declares and emergency by tapping the emergency button rapidly 4 times.
.png)
Upon activation, the app shows a prominent alert banner. The push notification badge may also be visible. Tap View to see the alert details. Pressing Clear ends the emergency for all users. The alert sounds may also be silenced by tapping the push notification or viewing the alert.
.png)
💡 An active PTT call will silence the alert notification sounds, so that the PTT call can be heard.
Any app user can view details of the emergency by tapping the View button or on the push notification badge.
.png)
In the admin portal, an active emergency is shown by a banner, which will be displayed on all portal pages.
.png)
The alert banner shows a View on Map button, which if clicked, will display the map page and highlight the alert location. If more than one alert is active, the right sidebar will display them all. Clicking on one will show the selected alert on the map.
.png)
Our support team answers the phone. Call us at 1-888-826-4607 or drop a note — we usually respond within a few hours.
While real-time voice comms are at the heart of Tango Tango, the surrounding platform gives you multiple tools to Respond Faster.
Turn any phone or browser into a radio. iOS, Android, Web.
Learn more →Ruggedized handheld & in-vehicle radios on nationwide LTE.
Learn more →Connect your existing two-way radio system to the app.
Learn more →Alerts and tone-outs for CAD, Raptor, and more.
Learn more →Mission-critical P25 radios for first responders - rugged, loud, powerful.
Learn more →Track people, field assets like fire hydrants, and see weather overlays right in the app.
Learn more →Talk to a real person. Get set up in one call. Start a 30-day trial today.